How to connect Microsoft Active Directory into CzechIdM
Since MS AD is the major directory service spread across the enterprise environment, connecting it to our identity manager CzechIdM is one of the most frequent task we come across. This text is a short tutorial of how to manage accounts of users in AD via an identity manager CzechIdM. It will guide you through all the steps from the connector setup to the system provisioning configuration.
Introduction
This tutorial will show you how to connect AD as target system for users (their accounts) from CzechIdM. We will use AD bundle connector from connId framework.
Before you start
First of all, you need to download the connector from Connid (e.g. Connid AD bundle 1.3.4 jar file). Then import the jar file into your application server library classpath. In case you installed CzechIdM into tomcat, then it can be placed there. If your CzechIdM is running, refresh web browser window (e.g. ctrl+F5).
Basic configuration
Go to Systems from main menu, then above list of current systems use Add button. On first page just fill system name.
On the same page you may need to set new password policy in case that your default policy does not meet all requirements of AD configuration. If you do not want to generate passwords for AD accounts, you can skip this step at all.
Connector configuration
In the next step switch to menu Configuration of your new system. At first you need to choose the appropriate connector, witch in this case is net.tirasa.connid.bundles.ad.ADConnector(connId). It will open specific configuration for that choice.
Thereafter fill important fields.
Example configuration for our local AD:
-
Server hostname – hostname or IP
-
Server port – usually 389 or 636
-
Principal – login of the user with admin privilege that CzechIdM will use for connection. DN of the user should work too.
-
Principal password – password of the administrator user
-
Root suffixes – the list of the roots that connector uses for managing users. If you do not want to manage some account, it is advised not to include them in the Root suffixes.
-
User search scope – manage users in specified container or subtrees. Usually subtree
-
Entry object classes – only objects (accounts) with object classes specified there will be managed. Each object class on new line, no comma or other separator. Usual values: top, person, organizationalPerson, inetOrgPerson,
-
Base contexts for user entry searches – usually the same as „Root suffixes“.
-
Group members reference attribute – usually „member“, use this if you want to manage group membership of user accounts
-
pageSize – this option is only available if you use connector that is customizes by BCV Solutions. It is advised to use number higher that number of accouts. E.g. 10000 for hundreds of accounts.
-
Uid Attribute – this is one of the most important option. It defines the primary key/UID of the account. Attribute values will be stored in CzechIdM for each account. Must be unique and should not change. It is strongly advised to use „sAMAccountName“, since connId connector has some problem with returning this specific attribute if mapped by other means.
-
Object classes to synchronize – usually the same as „Entry object classes“
Scheme
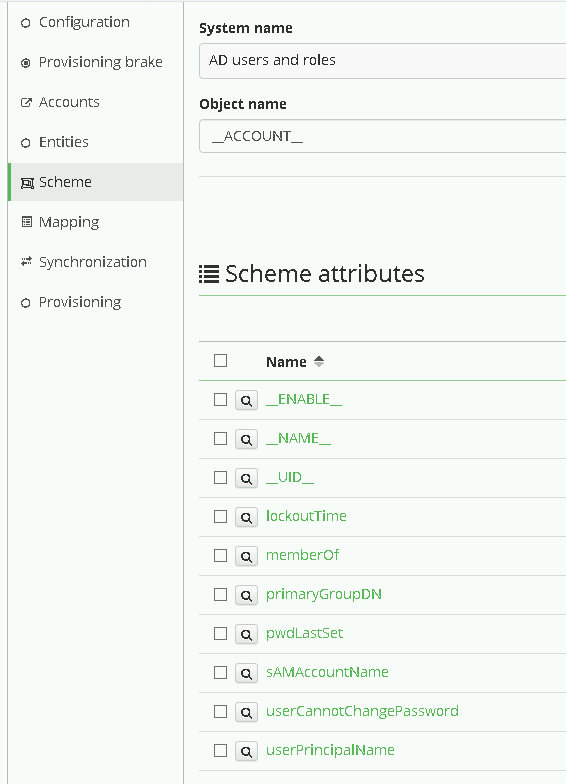
For next step, go to menu Scheme on the system.
You can let CzechIdM to generate scheme for you by click on Generate scheme button and that is also prefered way. In case of MS AD, connector usually create 3 object types. _ACCOUNTS_, _ALL_, _GROUP_.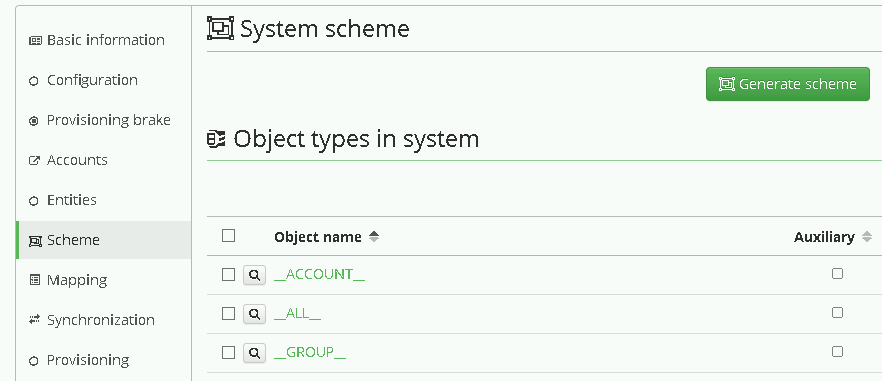
For user management we will use ACCOUNT. Click on the detail of the object type and check that the scheme attributes list consists of all attributes you want to manage in AD. If you connect AD for the first time, it is a good point to check some minimal set of attributes that allows you to create account, which are usually
-
__UID__ (if you have followed our tutorial, this attribute is synonymous to sAMAccountName)
-
__ENABLE__ – if you want to allow disabling user in AD. Sometimes this attributes is not generated by default, so you can create it manually.
-
__NAME__ (synonymous to DN, hardcoded in the connector).
Attributes mapping
Now go to menu Mapping. There you must set, which attribute from scheme is mapped to which attribute in CzechIdM.
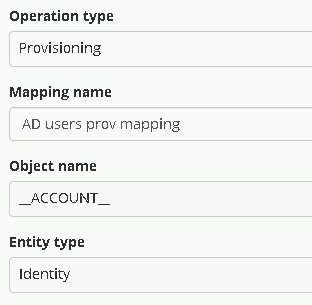
At first set:
-
Operation type: Provisioning – we want to manage data in AD from CzechIdM
-
Object name: __ACCOUNT__ – this is a standard type of scheme object in AD
-
Entity type: Identity – this entity type in CzechIdM we want to provision
-
As Mapping name set whatever you want, for example AD users prov mapping.
Then map scheme attributes to entity attributes as described below:
-
__UID__
-
Name – specify some more user friendly name e.g. sAMAccountName(__UID__)
-
Identifier – true
-
Entity attribute – true. Means that the attribute will be filled from basic Identity attribute set.
-
Entity field (selectbox) – User name
-
Other options may stay with default values.
__ENABLE__, mapping configuration is almost the same as __UID__, but do not set it as identifier. Map this schema attribute to entity attribute „Disabled“. You should also add transformation to the system, because CzechIdM holds the attribute „disabled“ and AD has attribute „enable“. So the transformation should return opposite value of the attribute in CzechIdM. To do so, click on the Insert script button in „Transformation to system“ window and find the script getOppositeBoolean. This should fill the window with the script call.
If you also want to create entities in AD, which is probable, map __NAME__ attribute that holds the DN of the account in AD. The configuration of the attribute may look like:
-
Attribute in schema – __NAME__,
-
Name – DN(__NAME__)
-
Entity attribute – true
-
Entity field – user name. In case that the DN on AD consists of the login of the user. Otherwise, you should choose other attribute or EAV.
-
The form of the DN varies on each instance of AD, so there usually will be some transformation to system like
return "CN=" + attributeValue + ",OU=employees,DC=yourcompany,DC=com". Of course your tree can be more complex, in that case you should follow some of our tutorials.
Role for AD
If you want some more options, follow How to create a role.
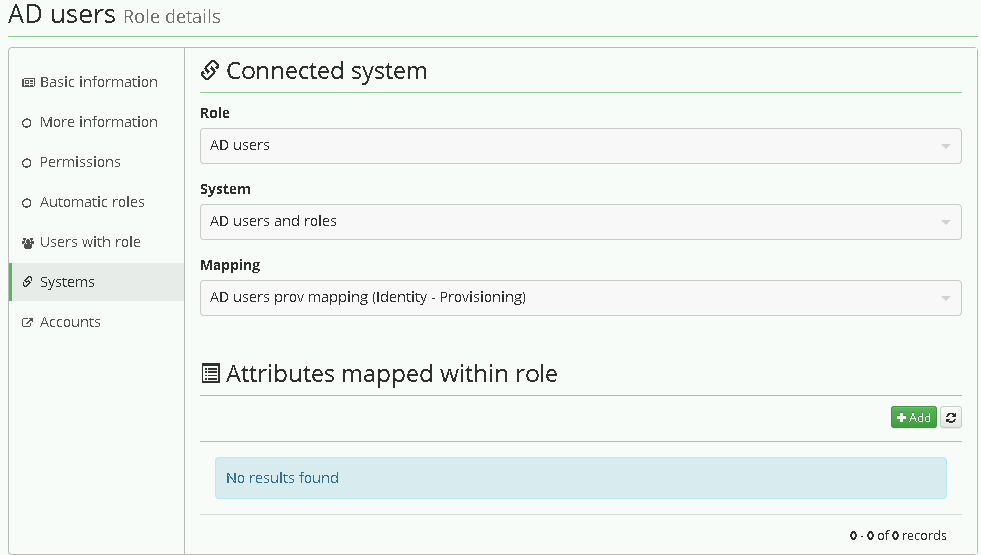
Then in the role detail, go the the menu tab Systems, add a new system and choose previously created one – „AD users and roles“. Then also choose your provisioning mapping, there should be only one, and save it.
From now on, every time user gets the role, it is provisioned into the connected system AD. You can see that on users detail menu tab „Provisioning“ or in the audit „Provisioning“
Finally go to menu Provisioning and add new one set its Name and these fields:
-
Allowed: true
-
Set of mapped attributes: Select mapping from previous step.
-
Correlation attribute: __NAME__
You can leave the rest of congugation at the default values.
Read more
More details about connecting a system can be found in CzechIdM tutorials. If you have any questions or comment feel free to comment on redmine, github or email us on info@bcvsolutions.eu. Also join our google group to keep in touch with CzechIdM news.
